Wednesday, April 29, 2020

Enhanced Email Option in Dynamics 365 UCI

Introduction

In the traditional Dynamics 365 CRM if you are creating an Email activity for any entity record then CRM redirects you away from the current record. So if you need any information from that record then you have to go to that record and thus this is somewhat a time-consuming process for those who write emails quite often. But now with this new feature, you can write emails within the record with a popup window called Contextual Email Window.
With Contextual Email Window, you will not be navigated away from your record and will be able to compose an email within that record.
Following are the steps to enable this feature:
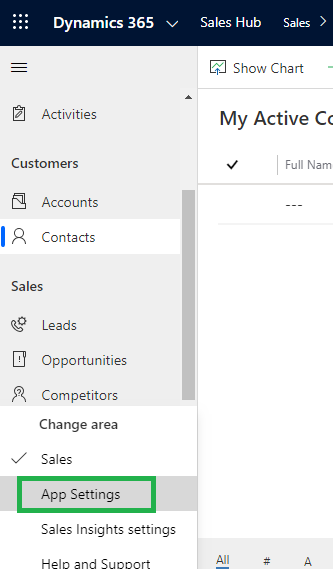
1. Go to App Settings area
Enhanced Email Option in UCI

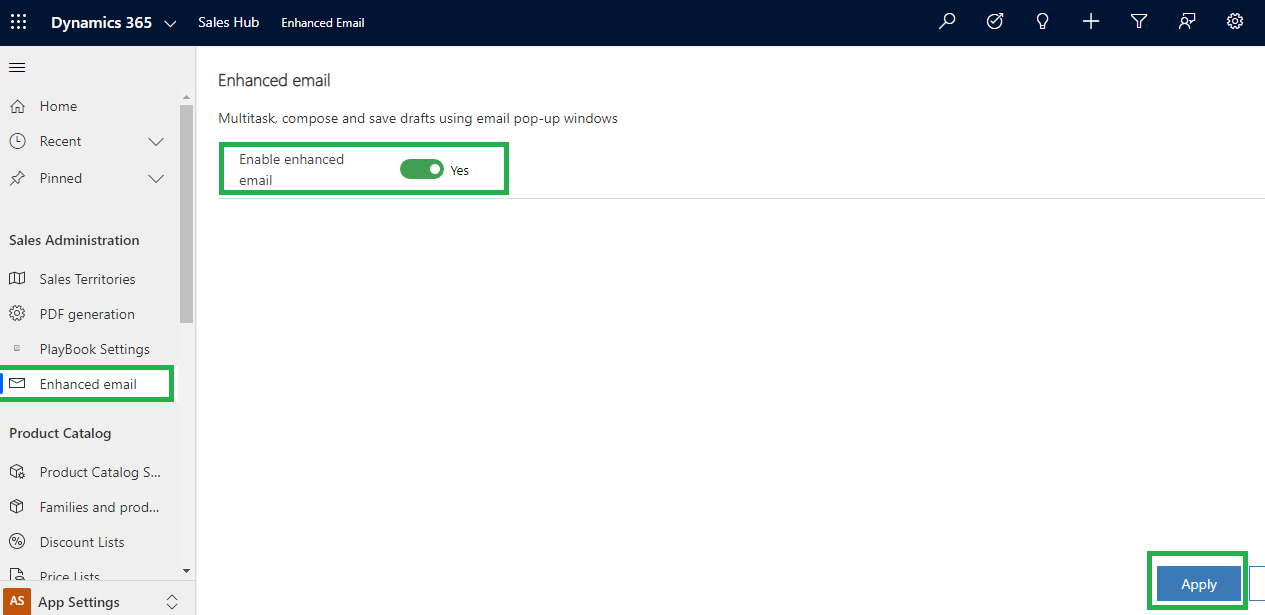
2. Select Enhanced Email option under Sales Administration, it will give you option “Enable Enhanced Email” to enable it click on the toggle button on the right side. After enabling this option click on Apply to save the changes, as shown below screenshot:
Enhanced Email Option in UCI
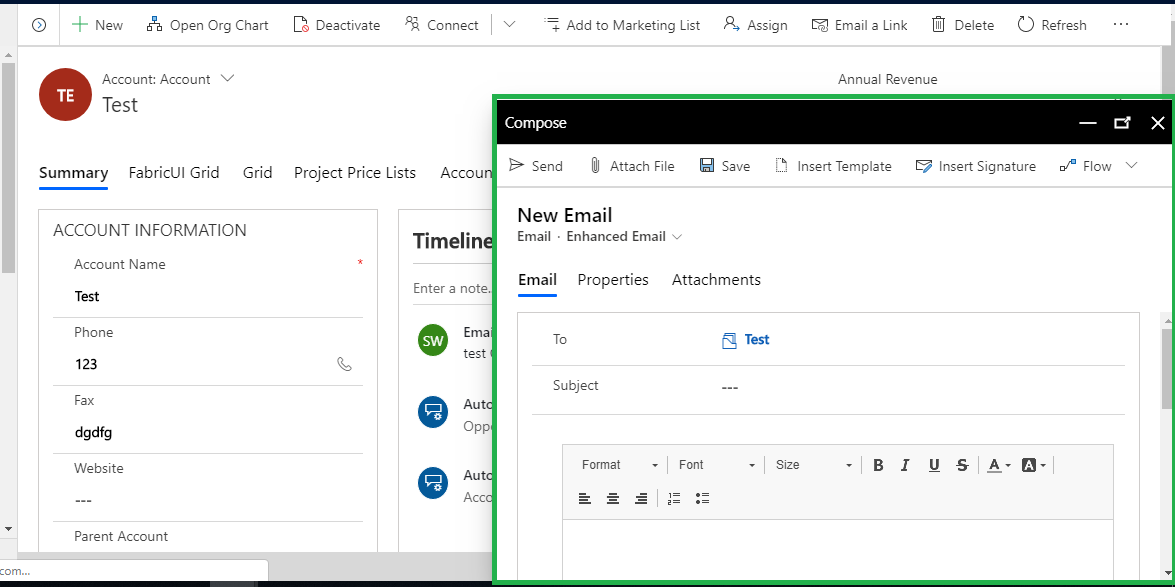
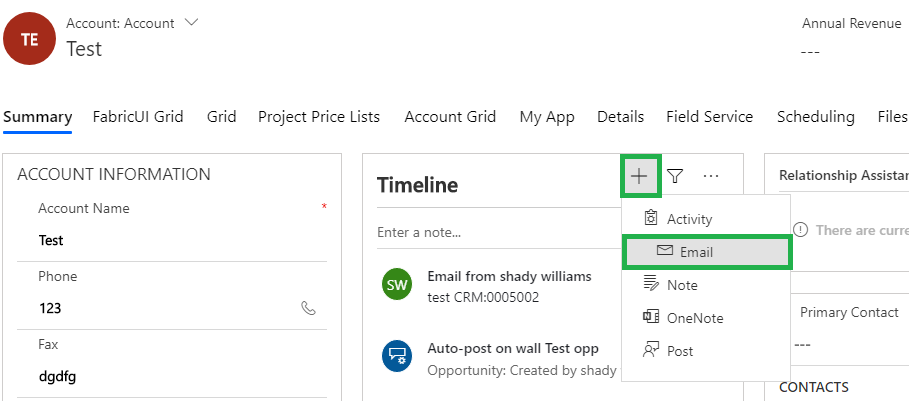
3. After that navigate to any entity, let’s suppose we choose Account entity. Create new record or else open existing record, click on “+” sign on Timeline in Dynamics 365 CRM to create email activity record, as below:
Enhanced Email Option in UCI
4. It will open new docked window to create email record within Account record, as given in below screenshot:
Enhanced Email Option in UCI

How to use Solution Layers in Dynamics 365 CRM

Introduction

Microsoft Dynamics 365 CRM has introduced the feature called ‘Solution Layers’ in V9.x. In this blog, we will describe the use of ‘Solutions Layers’.
As the user of Dynamics 365 CRM, we usually play with the solutions in our CRM for many purposes. We export/import many components like entity, dashboards, etc. using solutions within different Dynamics 365 CRM.
We have thus, came across scenarios, where the same components can be used by many solutions. Many a time, we have used the same components in different solutions for different purposes.
Now, let’s walk through the Solution Layers feature and gain a better understanding about the same.
Here, we can see the ‘Solution Layers’ button in Default and other solutions of Dynamics 365 V9.
Go to Settings > Customizations > Default / Required solution.
Solution Layers in Dynamics 365 CRM
Now, to view solution layer of any components included in the selected solution, select any one component like Account entity and click on solution layer button.
On click of this button, it will show the list of all managed solutions which included selected component, as shown in the below screenshot:
Solution Layers in Dynamics 365 CRM
It will also show managed solution list in the same order in which the solutions has been imported in your organization. The above screenshot indicates that the Account entity has been used by the list of solutions shown in the screenshot.
Now, to view the properties of components used in solution layers, click on layer and it will show the properties of components.
Solution Layers in Dynamics 365 CRM
As we can see in the above screenshot, it is showing two tabs – ‘Changed Properties’ and ‘All Properties’.
In ‘Changed Properties’, it will provide details of properties that has been changed for component in the selected solution.
Whereas ‘All Properties’ shows the list of all properties whether it has changed or not, as shown in the below screenshot:
Solution Layers in Dynamics 365 CRM

Conclusion

In this way, the Solution Layers button will help us to track changes in the properties of components used in solutions.

How to Connect to CDS/Dynamics 365 CRM

Question

"I need to write a small console app that can authenticate to an online CRM instance with multi-factor authentication turned on. Can anyone point me in the right direction on how to accomplish this?"

Here is the code😉😉

using Microsoft.Xrm.Tooling.Connector;
var connectionString = @"
AuthType=OAuth;
Username=<username>;
Url=https://<yourorg>.crm.dynamics.com;
AppId=51f81489-12ee-4a9e-aaae-a2591f45987d;
RedirectUri=app://58145B91-0C36-4500-8554-080854F2AC97;
TokenCacheStorePath=c:\MyTokenCache;
LoginPrompt=Auto";
var client = new CrmServiceClient(connectionString);
if (client.IsReady)
{
    Console.WriteLine("OK");
}
else
{
    Console.WriteLine(client.LastCrmError);
}


[Don’t forget to] Add Nuget package Microsoft.CrmSdk.XrmTooling.CoreAssembly